Table of Contents
Introduction
Are you looking to replace the motor of your electric fan but unsure where to start? You’re not alone. Many people find themselves in the same situation when their electric fan’s motor starts to fail. In this comprehensive guide, we’ll walk you through everything you need to know about electric fan motor replacement. From understanding the importance of timely replacement to following a step-by-step process, we’ve got you covered.
Why Electric Fan Motor Replacement Matters
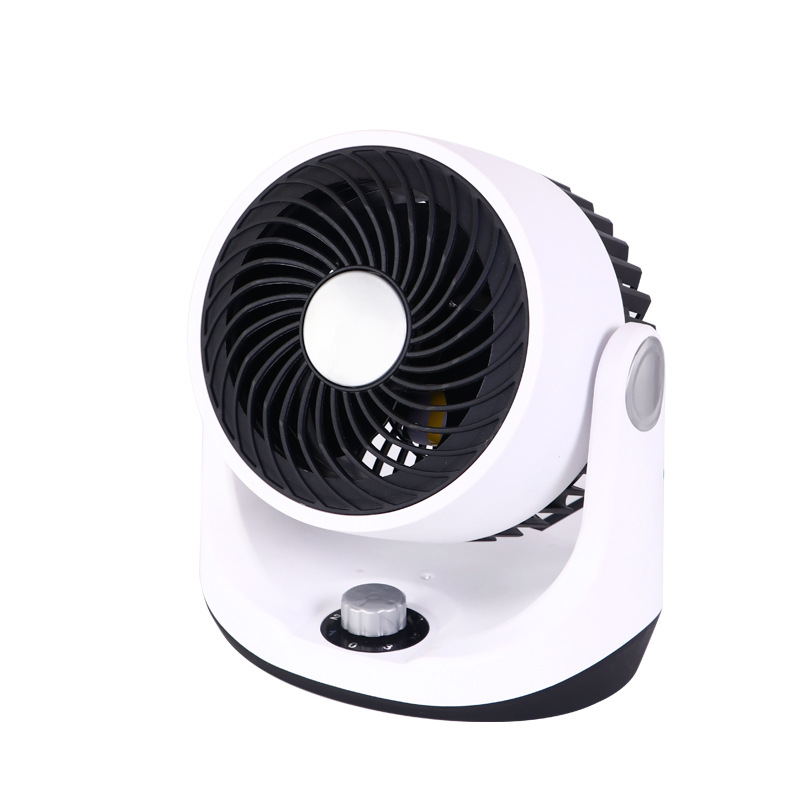
Electric fans are essential for maintaining comfortable indoor environments, especially during hot weather. The motor is the heart of the fan, driving its operation and ensuring efficient airflow. When the motor fails, the fan becomes ineffective or even completely stops working. Instead of discarding the fan and buying a new one, replacing the motor can be a cost-effective and environmentally friendly solution. It extends the life of your fan, saves you money on a new purchase, and reduces waste.
Signs That Indicate It’s Time for a Motor Replacement
Recognizing the signs of a failing motor is crucial for timely replacement. Here are some common indicators:
- Strange noises: Grinding, squealing, humming, or clicking sounds coming from the fan often signal motor trouble. These noises may result from worn-out bearings, loose components, or damaged motor windings.
- Fan won’t start: If your fan fails to start when powered on, the motor might be at fault. This could be due to a burnt-out motor, faulty wiring connections, or a blown capacitor.
- Overheating: A motor that becomes excessively hot during operation is a red flag. Overheating can damage the motor’s windings and insulation, leading to permanent failure if not addressed promptly.
- Slow or uneven blade rotation: When the fan blades spin slowly or inconsistently, it may indicate motor weakness or electrical issues within the motor.
- Intermittent operation: If the fan starts and stops randomly or stalls frequently, the motor could be struggling to function properly.
Addressing these issues by replacing the motor can restore your fan’s performance and prevent further damage.
Tools and Materials You’ll Need
Gathering the right tools and materials beforehand ensures a smooth replacement process. Here’s what you’ll need:
- Tools:
- Screwdriver set (Phillips and flathead)
- Multimeter
- Wire stripper/cutter
- Pliers
- Electrical tape
- Wrench or socket set
- Safety equipment (gloves, goggles)
- Materials:
- New electric fan motor compatible with your fan model
- Replacement bearings (if needed)
- Lubricant
Step-by-Step Guide to Electric Fan Motor Replacement
Preparation
- Safety first: Always prioritize safety. Turn off the power to the fan at the circuit breaker or unplug it from the power source. Allow the fan to cool down completely before handling any components.
- Clear the area: Remove any debris, dust, or obstructions around the fan to create a clean and clutter-free workspace.
Removing the Old Motor
- Access the motor: Open the fan’s housing or access panel to expose the motor. This may involve removing screws or clips holding the panel in place.
- Label and disconnect wires: Carefully identify and label the wires connected to the motor using tape flags or tags. Note their positions and connections for accurate reassembly later. Then, use a screwdriver or pliers to loosen the terminal screws and disconnect the wires from the motor.
- Remove mounting hardware: Unscrew the bolts, screws, or clips that secure the motor to the fan housing. Keep all hardware organized for reuse.
- Extract the old motor: Gently pull the old motor out of its housing, being cautious not to damage any surrounding components or wiring.
Installing the New Motor
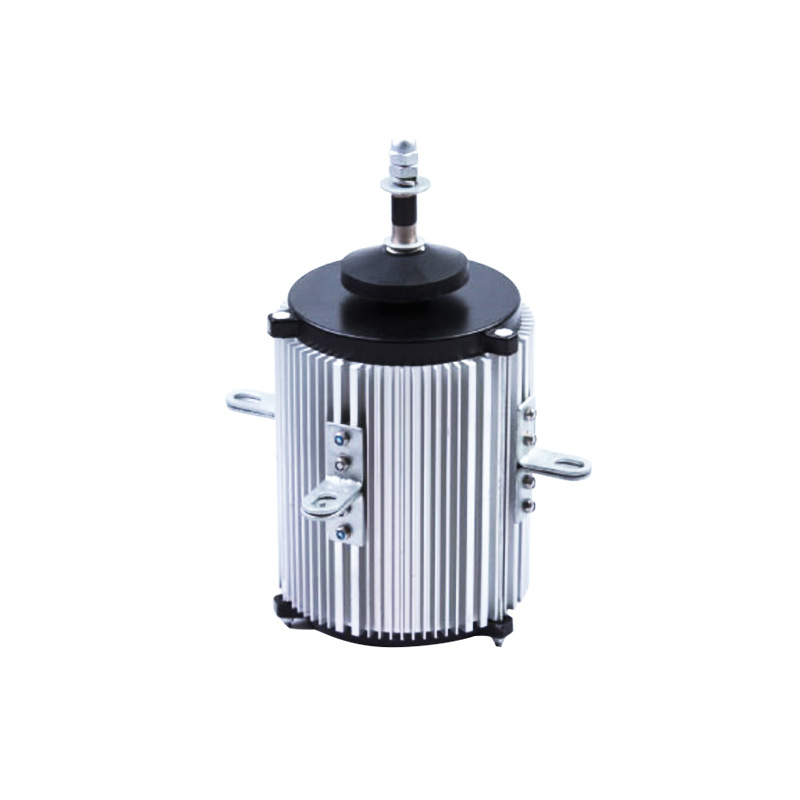
- Inspect the new motor: Verify that the new motor matches the specifications of the old one, including voltage, horsepower, speed, and frame size. Check for any visible damage or defects.
- Position the new motor: Place the new motor into the housing, aligning it with the mounting holes. Ensure that the motor shaft is properly positioned and centered.
- Secure the motor: Use the previously removed screws or bolts to secure the new motor to the housing. Tighten them evenly in a diagonal pattern to ensure proper contact and alignment.
- Reconnect wires: Refer to your labels and reconnect the wires to the corresponding terminals on the new motor. Make sure the connections are tight and secure. Use electrical tape to insulate any exposed wires.
Post-Replacement Steps
- Reassemble the fan: Put the fan back together by reversing the disassembly steps. Reattach the housing or access panel, ensuring all screws and clips are tightened securely.
- Test the fan: Turn the power back on and test the fan’s operation. Check if it starts smoothly runs, quietly, and provides adequate airflow. If you notice any issues like unusual noises, overheating, or uneven rotation, turn off the power immediately and recheck your connections and assembly.
Troubleshooting Common Issues
- Fan not starting: If the fan doesn’t start after replacing the motor, check the electrical connections to ensure they’re secure and properly aligned. Verify that the power supply is functioning and that the motor hasn’t been installed backward.
- Overheating: Overheating can be caused by several factors, such as incorrect motor installation, tight bolts distorting the frame, or insufficient lubrication. Ensure the motor is installed correctly, bolts are tightened appropriately, and bearings are lubricated properly.
- Excessive noise: Noise issues may arise from misaligned bearings, loose components, or damaged motor windings. Double-check the bearing alignment, tighten any loose parts, and inspect the windings for damage.
- Wobble or vibration: This can occur if the blade arms are loose on the motor shaft or if the blades are not balanced properly. Tighten the blade arm set screws and ensure the blades are aligned at equal angles.
Conclusion
Replacing an electric fan motor is a feasible DIY project that can save you money and extend the life of your fan. By following this step-by-step guide, you can successfully replace the motor and restore your fan’s functionality. Remember to prioritize safety throughout the process and take your time to ensure accurate connections and proper installation. With your newly replaced motor, you’ll be able to enjoy cool and comfortable breezes from your electric fan once again.
How to Purchase:https://looperbuy.com/search?keywords=electric+fan+motor+replacement
Related Questions and Answers
Q: How long does it typically take to replace an electric fan motor?
A: The time required to replace an electric fan motor can vary depending on your experience and the complexity of the fan model. Generally, it can take anywhere from 30 minutes to a couple of hours.
Q: Can I use a motor with different specifications than the original one?
A: It’s not recommended to use a motor with different specifications than the original one. The new motor should match the voltage, horsepower, speed, and frame size of the old motor to ensure proper performance and compatibility with your fan.
Q: How often should I replace my electric fan motor?
A: The lifespan of an electric fan motor can vary depending on usage and maintenance. With proper care and regular maintenance, a motor can last several years. However, if you start experiencing issues like strange noises, overheating, or the fan not starting, it may be time to replace the motor.
Q: Are there any safety precautions I should take when replacing the motor?
A: Yes, safety should always be a priority. Turn off the power to the fan at the circuit breaker or unplug it from the power source before starting any work. Wear gloves and goggles to protect your hands and eyes. Be cautious when handling wires and electrical components to avoid electric shock.
Q: Can I lubricate the new motor to prevent future issues?
A: Yes, lubricating the new motor can help prevent future issues like overheating and noise. Apply a small amount of lubricant to the motor bearings as per the manufacturer’s recommendations.
Hot Tags: Electric Fan Motor Replacement; Electric Fan Motor; Fan Motor Replacement; DIY Fan Motor Replacement; Fan Motor Troubleshooting; Electric Fan Repair; Fan Motor Maintenance; Fan Motor Installation; Fan Motor Specifications; Fan Motor Lubrication